BPQ-250 Build
First, some background: I have been flying larger quads with brushless gimbals, GPS controllers, etc… I made the break into an FPV quad with the Flip FPV by Hover Things. I quickly learned that I had no idea how to really fly a quad copter, so I purchased the SimpleCopter V-Tail and began to learn how to fly. This was a great quad to teach quad flying LOS (I think) because it is very easy to determine front from rear. I painted mine a florescent green and pink, so it really stood out.
I wanted more, though. I wanted to do some close proximity flying. Thus, I began my search for a 250mm mini-quad. After searching for a while, I decided to get a relatively new 250mm quad, the BPQ-250 from BP Multirotors. BPQ stands for Bullet Proof Quad and is made of Polycarbonate. It is suppose to be indestructible. I first learned about the BPQ-250 from it’s creators post on RC Groups and soon after placed my order for 2. Why 2? I break things… a lot, even indestructible things… besides that it’s a great price!
The BPQ-250 is so easy to build, it doesn’t really warrant a build log per-se. I did take some pictures along the way that’ll I’ll share, but first… what did I put in my BPQ-250? In the order of RX signal out -> video signal back…
- FrSky DR4-II RX. This is my favorite
local RX for anything with an Auto Pilot or Flight Controller. It’s tiny yet full featured.
Features CPPM out and RSSI. - MultiWii Flip 2.5
flight controller. A 1.5 would have done fine, but I had a few 2.5’s laying around. I was
going to put a spare OpenPilot CC3D
controller in but I realized I didn’t have a spare cable for the Bluetooth adapter I have
for configuration (more on that later) - Exceed RC Proton 12A ESCs. Why these
ones? Available, light, small, usable BEC. - SunnySky 2204/2300kv motors.
- HQ 5x3 props
- Battery Voltage Alarm: I really
like this as its cheap, durable and always on the aircraft, wired directly into the wiring harness. - Bluetooth Adapter.
Used only during initial configuration. It may live on a new quad for a week or so while I tweak its
flight controllers settings. It says for Android Configuration, but it’s standard bluetooth. I don’t
have an Android device. I use my MacBook Pro to configure it in the field. - Mobius ActionCam that serves to record HD video and act as my FPV camera
- LC Common Mode Power Filter
which is responsible for delivering clean power to my VTX - Immersion 5.8GHz 600mw VTX
- IBCrazy Cloverleaf Antenna
And now for some build pictures:
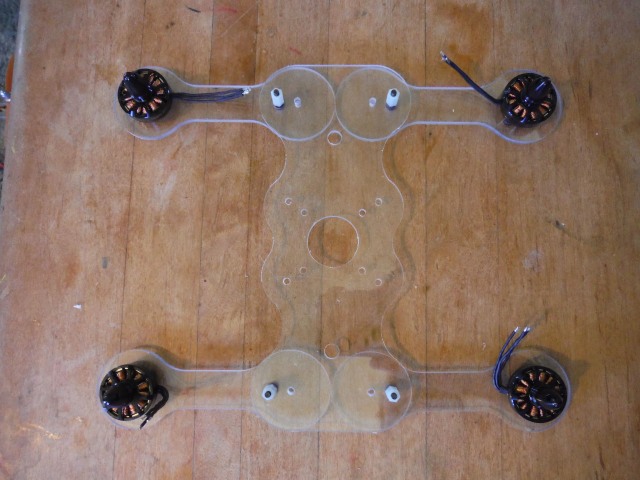
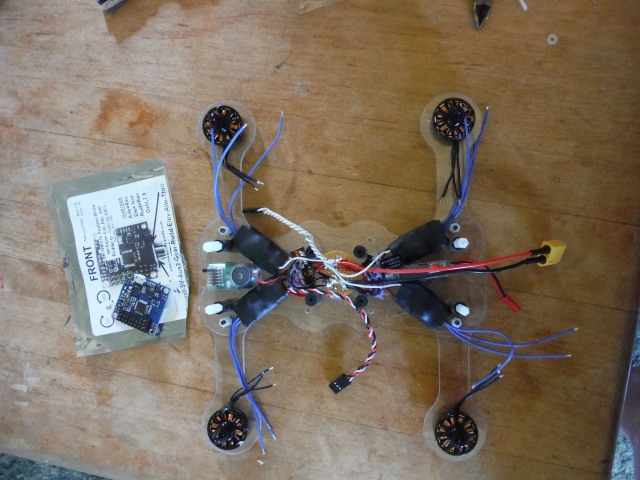
Legs mounted to the bottom plate
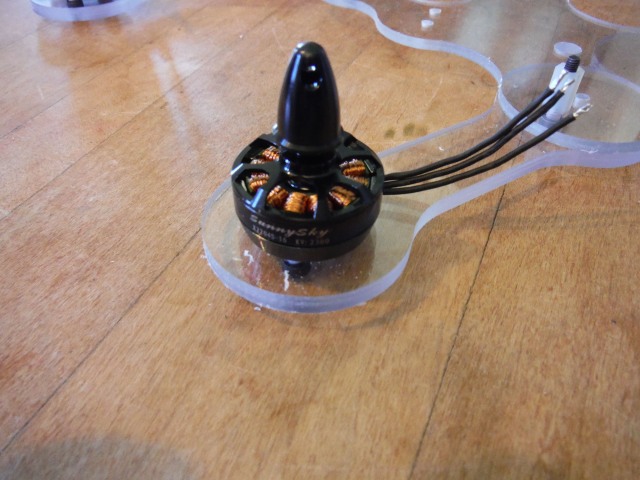
SunnySky 2204/2300’s mounted
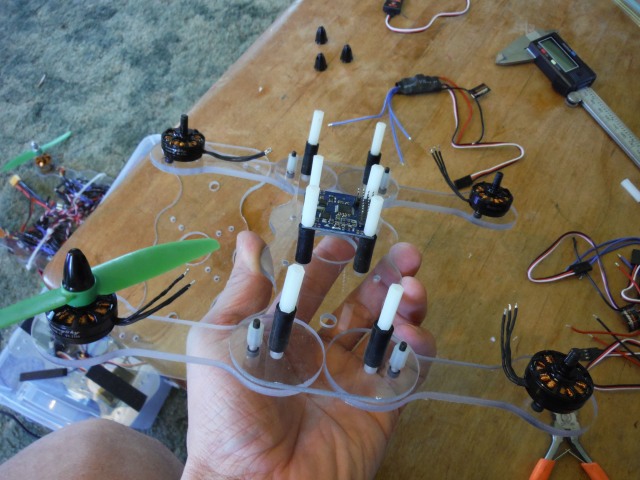
Vibration dampening installed as well as the MultiWii Flip 2.5
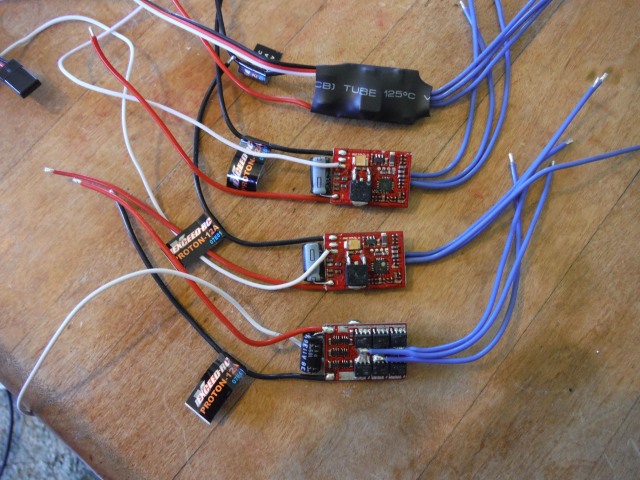
ESC signal ground and signal power removed from three controllers. Later I trimmed the wires quite a bit on all 4 ESCs as they were pretty long.
My light weight, cheap power break out board. It’s a circular perf-board from Radio Shack. I soldered positive wires on the right, negative on the left. I then stripped a good deal off the main battery power wires to link them all together. The perf-board is just used as an anchoring point.
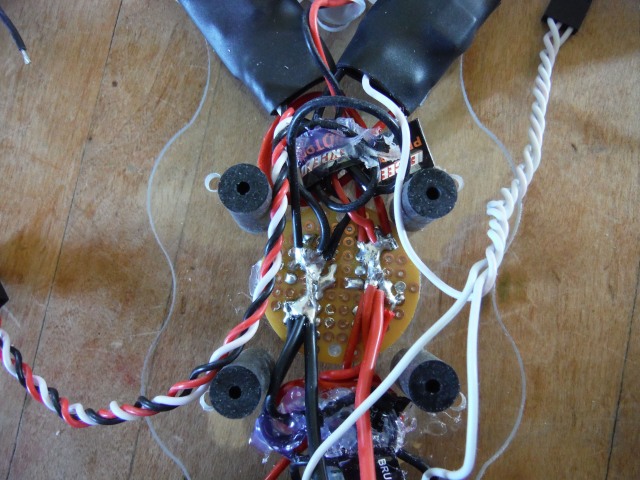
A little more detail on my perf-board distribution board. I have some liquid electric tape that I will paint on once I am sure I’m done.
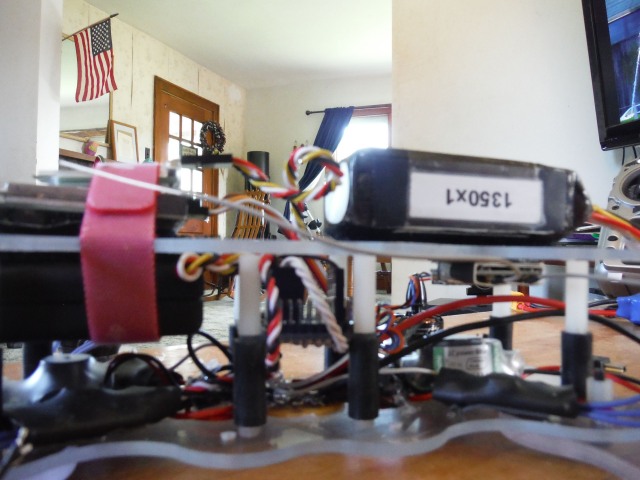
All the gear just sitting on the quad, the top plate is not mounted down. I did this just basically to make sure everything fits as I envisioned and also to get some early idea of my AUW, which turned out to be 539g with a 1350mAh 20C battery.
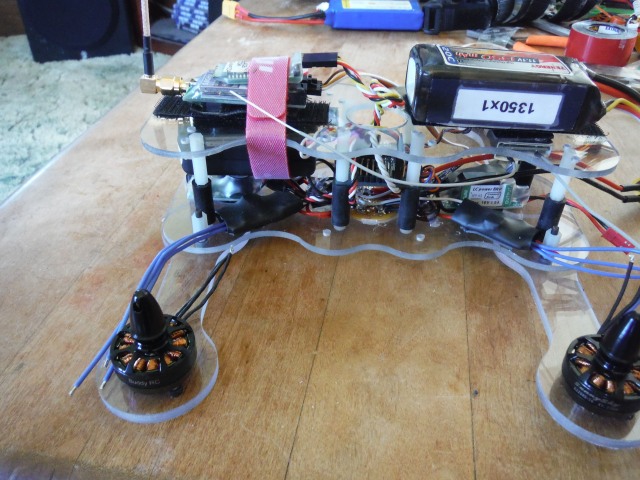
I used 3M Extreme Mounting Tape on the ESCs, Power Filter, Battery Alarm and RC RX.
I label all my batteries. My system is the mAh rating - sequential number. So, I may have 1350-1, 1350-2 as you see here and also 3300-1, 3300-2, … I then keep a battery log as to the number of uses/charges, the cell resistance is periodically checked and logged as is balance charges.

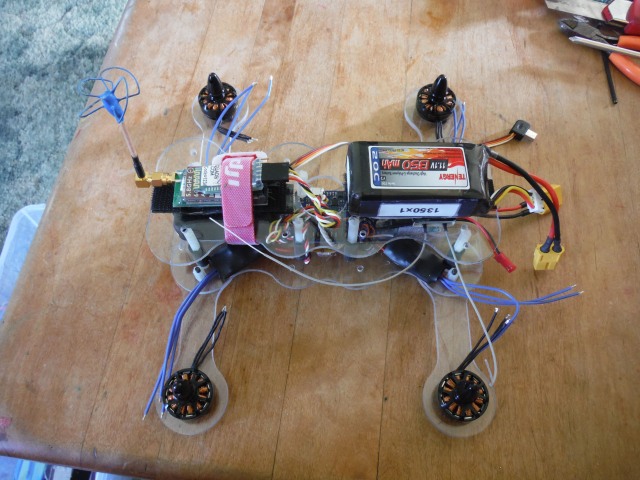
I’m not entirely happy with my Mobius mounting. I really like that it is protected, but it is hard to swap from aircraft to aircraft and worse yet, in this configuration it is mounted upside down while all other aircraft I use it on (planes and my V-tail) it is mounted right-side up. Thus I have to reconfigure it when switching to other crafts.
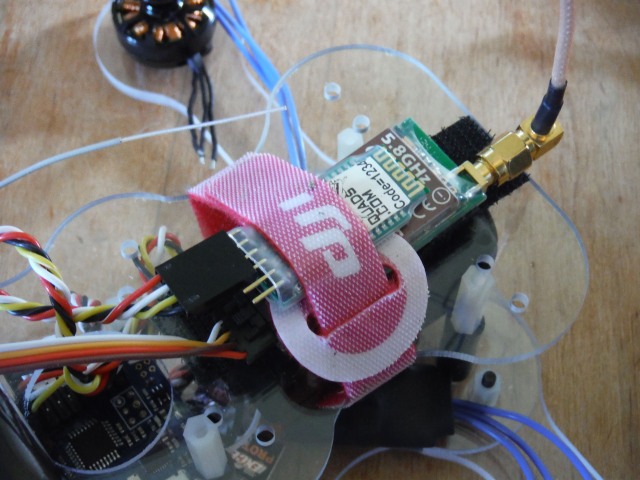
This is a mess, but it is temporary. I only have one and I think I only need one, but that is the Bluetooth Adapter. I connect this and zip tie/velcro the wire out of the way somewhere only when configuring a new quad. I don’t like to plug it into the computer, change the PID settings, unplug, fly, plug it into the computer, …
Thus, I slap the bluetooth adapter on (works for my MultiWii and CC3D controllers) and can configure the controller on the fly. The only way to go.
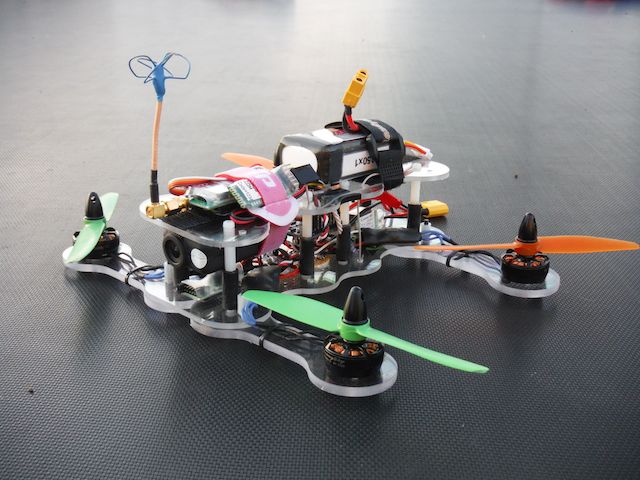
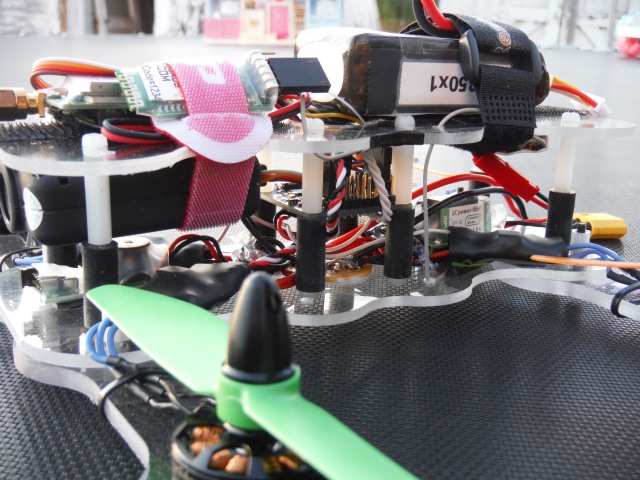
Here it is in a completed state in all its glory. Yes, the antenna has seen better days. Oh, this is on my trampoline which I typically use for beginning hover tests (after a hand held test to make sure control directions are correct). The trampoline not only allows for a cushioned landing but also a slippery surface to scoot around on while testing initial sensitivities.
If you look close, you can see the battery alarm in the front of the quad and the LC Power Filter in the rear. Also notice the signal wires for the ESCs. I only use the BEC from the first ESC. The rest are all wired into a single servo connector. They all have a common ground via the connection to the battery.
I also only use a single servo connector from the RC RX to the flight controller. That one connector passes power to the RX (+ and ground) as well as the CPPM signal stream.

The other side of the quad.
First Flight
I left the configuration alone for the MultiWii Flip 2.5 to start with. I believe the P values are a smidgen too high, but after hovering around for the first pack, I decided it was good enough for a first FPV flight around the farm.
I didn’t do anything daring, stayed a good 10’ above the ground and just flew around the farm staying away from trees and other obstacles. I like to prove the craft and also gain a good feeling for it before doing anything too crazy, especially since I am just learning proximity flying.
Conclusion
I will be cleaning up the wires a bit more as well. The problem? It was getting toward the end of the day and I wanted to go fly! So, I didn’t really trim the RX -> FC servo connection, nor the Mobius -> VTX. Those wires look terrible in the quad. The Bluetooth wires also do, but I don’t worry about that since it is not a permanent member of the quadcopter.
I am very happy with the quad. I like it’s simplicity and strength. I know this isn’t much of a summary, but I only have 1 real flight on it thus far, and at that, the controller isn’t setup totally right. So, as time goes on you will be hearing more about the BPQ-250 for sure!